The following set of instructions are for setting up the Cross Connect VPN service with an Android device. There is no guarantee that the screenshots will match your device exactly. Each manufacturer and carrier may make certain changes to where the various menus are located. If you have difficulty locating certain menus, please contact the support department for your particular device, either from the manufacturer or from your wireless carrier.
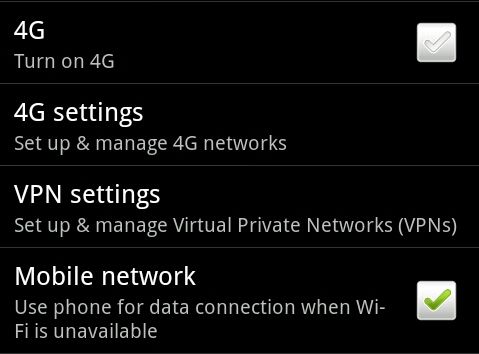
First, enter your Settings menu and select the Network settings.
Under Network settings, select VPN Settings.
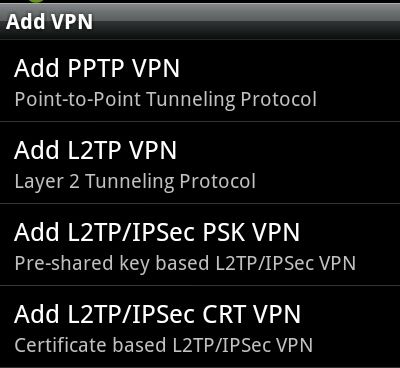
Select the option to Add a VPN.
Choose to add an L2TP/IPSec VPN with PSK (pre-shared key). Do not choose L2TP/IPSec CRT VPN. This is completely different.
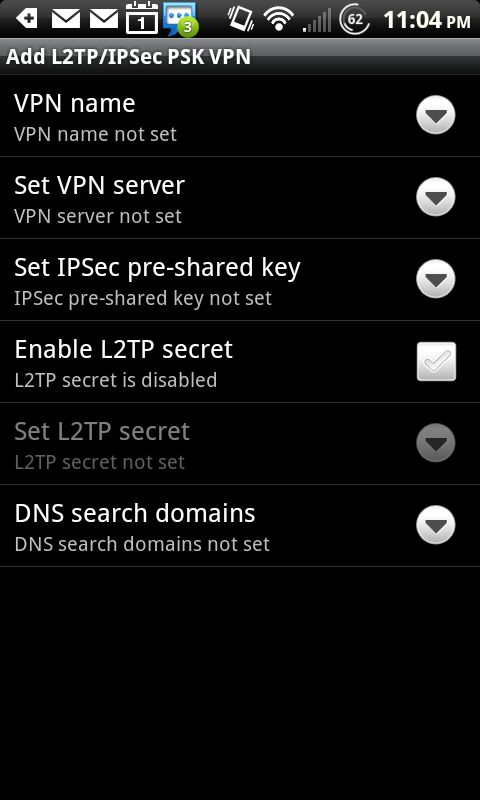
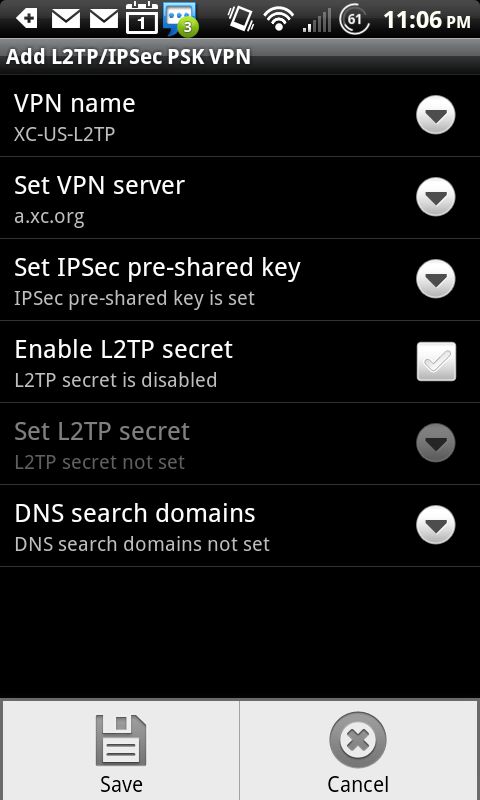
After selecting to add a new VPN, you should see a set of options similar to the screenshot below.
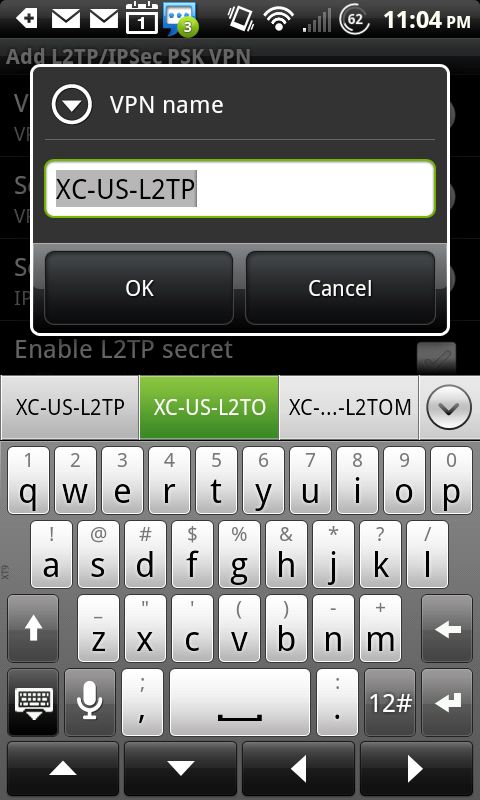
Select the option to name the VPN. While you can call it anything you like, something short and easily recognizable is usually preferred.
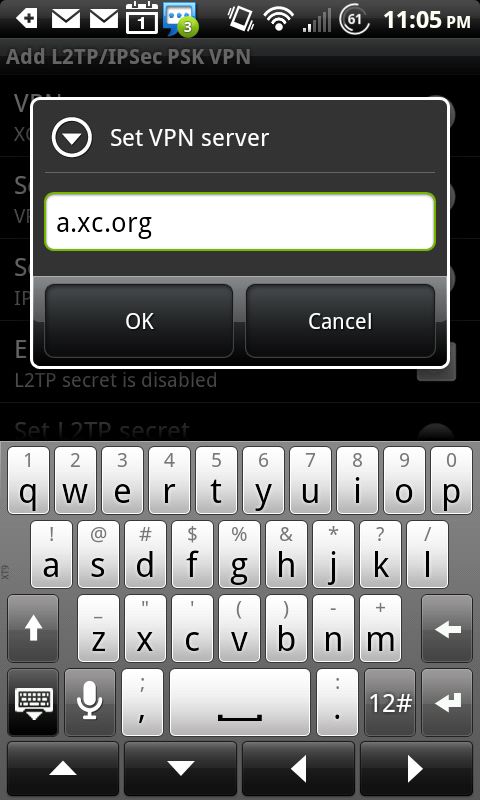
Next, select the option to enter the VPN Server. Put in the name of the Cross Connect VPN server you are using for your location.
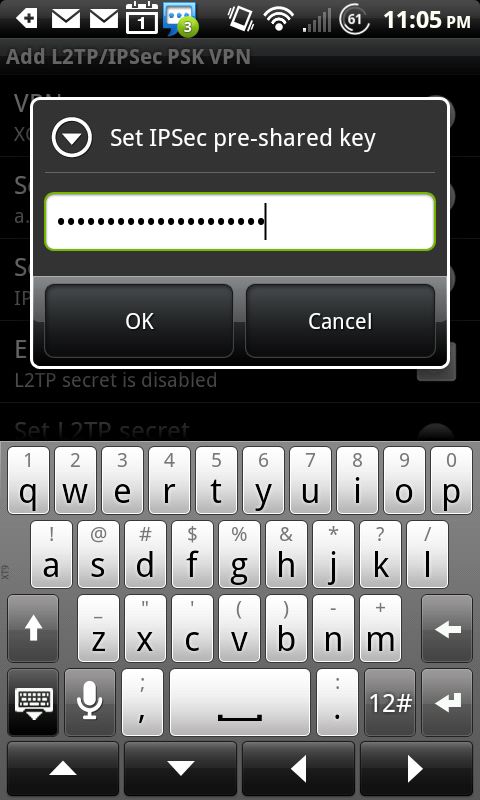
Next, select the option to enter the pre-shared key. You must obtain this from Cross Connect or from your IT Department if you are part of a corporate account.
Select your Menu key on your device and choose the Save option to save the settings you entered.
Your new VPN should be displayed in the list of available VPNs. To connect to it, simply tap it.
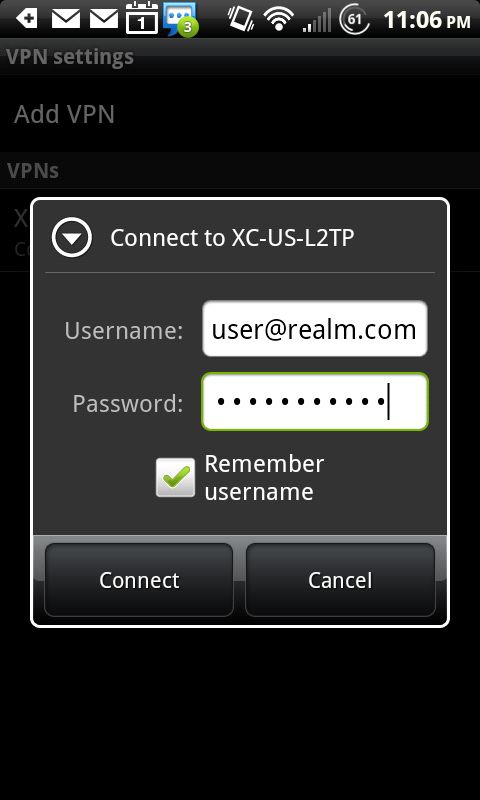
The first time you select the VPN, you will be prompted for your username and password. Enter those here. We recommend that you let the device remember the username (if allowed) and password (if allowed).
If you currently have Internet access through wifi or your cellular carrier, the device will attempt to connect immediately.
Once connected, the VPN menu will display a status to that effect. Your device may also display a key or other VPN indicator in the top status bar.
To disconnect from the VPN, just tap it again. It will display a message that it is disconnecting.

